New Trends in Interior Painting

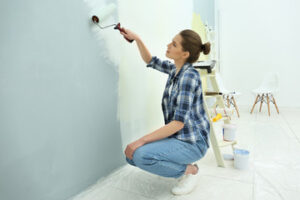
Homeowners can transform the interior of their homes with Painters Wilmington DE. New trends continuously emerge in color and style that can revitalize a room.

A skilled professional specializing in painting walls is an interior painter. Their responsibilities include surface preparation, understanding how different colors affect lighting and human perception, and selecting the right type of paint for various surfaces and environmental conditions.

painting

Stenciling is a great way to add interest to plain walls and furniture. Whether you are looking for a simple geometric pattern or something more intricate, there are many options available to you. When stenciling a wall, it is important to start with a clean stencil and to use minimal paint. This will help to prevent bleeding under the stencil and make it easier to clean up any mistakes that may occur.

Before beginning your stencil project, you should prepare the surface by priming and sanding if necessary. Once the wall has been prepared, you can begin painting. It is a good idea to use low tack painters tape to secure the stencil and mask off any areas you do not want to paint. Masking also helps to protect your windows, trim, and furniture from paint splatter.

When stenciling a wall, it is recommended that you use acrylic craft or latex paint. This type of paint has excellent opacity and is quick to dry, making it easy to work with. It is important to note that spray paint and oil-based paints should never be used for stenciling a wall as they do not provide optimum adhesion to surfaces.

Once you have chosen your stencil and positioned it on the wall, it is a good idea to mark the center of the stencil using a pencil or painter’s tape. This will help you to stay centered as you move across the wall. It is also a good idea to follow any registration marks that may be built into your stencil design.

Before you begin stenciling, it is important to properly load your brush or roller with paint. Pour your stencil paint into a tray or plate and evenly off load your stencil brush by rolling it over a piece of contractor’s paper or folded paper towels. Over-saturating your brush or roller with paint will lead to blotchy looking edges on your finished wall. Once your stencil brush is evenly loaded with paint, lightly dab it onto the wall without pressing too hard.

Rag rolling is an interior painting technique that can add a decorative touch to your walls and is especially effective when using latex paint. It is also a very child friendly method of painting and it can be used on furniture as well. Basically, the painter dips a piece of lint free cloth into the paint and then rolls it onto the surface. This creates a decorative effect that can mimic the look of parchment or even chamois leather. The result is a paint job that has an ornamental appearance and can be used in any room of the house.

Before you start your rag rolling, make sure you are completely ready to begin. Put on gloves, dunk the clean rag into the glaze and saturate it. Then roll the rag on the surface of the wall, twisting it and changing the direction of your movements to create different patterns. When the rag starts to get too saturated, use a new one. Continue this process throughout the room, overlapping and moving the rag around to create different textures.

If you want to try a more subtle variation on this technique, you can apply the glaze in long sweeping strokes instead of rolling it. Or, you can use a sponge to apply the glaze and achieve a more natural, faded appearance.

Another variation on this style is to create a wood grain effect by applying the glaze in quick, even strips and then wiping off the excess with a rag. This can be done on wood trim, cabinets and even doors. The process begins with sanding the door or piece of wood and then applying a latex base coat. Once the paint dries, mix together a small amount of True Value EasyCare Ultra Premium Interior Paint in a flat finish with water. You will need about equal parts paint to water for the solution (less water for a thinner finish).

The art of hand-lettering is still quite significant despite the increasing popularity of documents and artwork being made digitally. The practice has been proven to help children unleash their creativity and even grasp language more effectively than simply typing it on a keyboard. Lettering can be done in a number of ways, including freehand or using a stylus. In addition to letters, the art of lettering also involves other decorative elements like swashes and flourishes.

Creating a creative style of lettering allows the artist to reimagine the word and express it through shapes, objects, textures, drawings, or words. This technique is often used to create logotypes, as it provides a unique and memorable way of communicating with the audience. This type of lettering is often more whimsical than formal, and it can add a touch of elegance to any piece.

When working on a piece of lettering, it is important to keep the size of the letters in mind and remember that they are meant to be seen. This is why it is not always necessary to draw lines and adhere to perfect measurements. It is much better to trust your own eyes if something doesn’t look right, as perception often trumps geometric perfection.

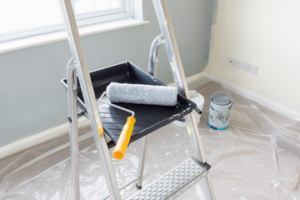
When working on an interior painting project, it is important to prepare the space before starting. This includes removing any furniture from the room, covering floors and surfaces that do not need to be painted with plastic sheeting, and preparing switches and outlets by taping them or removing them completely. The preparation process can be time consuming, but it is essential to ensure the best results for your project. Whether you are working on a simple room or a large house, interior painting requires a high level of skill and attention to detail.

If you’re looking for a timeless paint technique that will give your home an antique look, try using lime wash on the walls. Lime wash, also known as whitewash, is a traditional type of paint made from slaked lime, minerals and water. This milky liquid creates a soft, chalky finish that gives your walls a unique and ethereal charm.

This ancient paint has been used for centuries and was often a staple finish on Roman houses. The simplest version of this finish consists of just hydrated lime and salt, but more complex versions use an aged lime putty with natural pigments that are then thinned down to create the lime wash.

These traditional lime washes are perfect for raw brick, bare masonry or even existing plaster. They are easy to apply and can be sprayed on or brushed on. The paint dries to an almost matte finish and can be waxed over for additional protection against dirt & grime build up. Since the paint is breathable it allows your walls to breathe and can reduce moisture in the air which helps prevent cracking.

Unlike most other types of paints, lime wash does not require priming before use – however you will want to thoroughly clean and prepare your wall surface before applying. It is also free of chemicals & volatile organic compounds (VOCs) which means that it is safe for the environment. It can be re-applied as needed to refresh and maintain your walls and is also a great option for outdoor surfaces. The alkalinity of the paint also deters invaders such as wood boring beetles and offers a sort of sterilisation for your walls.

Interior painting can create a new look for any room. It is one of the most cost-effective ways to make a home or office more attractive, and can increase its value if you plan to sell it. A fresh coat of paint can also improve air quality, reducing the amount of harmful VOCs released into the environment.

Before any actual work begins, the professional painters will perform a thorough inspection of the area being painted. They will check the surfaces to be painted and their condition, address any repairs or damage, take measurements of the space, and review any additional requirements or expectations you may have. This overview helps them give you an accurate estimate of the total job.

Then, the painters will move onto preparing the area to be painted. They will remove any hardware that is on surfaces to be covered, and cover anything else that needs protecting. Drop cloths will be placed throughout the area, and the furniture will be moved to another part of the room if necessary. Painters tape is then used to cordon off areas that do not need coverage. Then, the painters will clean the walls and ceilings, apply primer if required, and then begin to paint.

After the painting is completed, a sealer or varnish should be applied. This will protect the finish from any spills or stains and help keep it looking its best.

A pickled finish is a great way to add a rustic, vintage look to any piece of wood furniture. It is a simple, inexpensive technique that requires little more than some paint and a few basic tools. It is also a good way to give old furniture a new lease on life.

Interior Painters Can Update Your Home Without the Costly Renovations

Painters can help you update and modernize your home without the costly renovations other projects require. They also know how to pick the right paint colors, and they can recommend low- or no-VOC options that fit your lifestyle.

Interior Painter

Remodeling can be messy, but a good interior painting pro will clean up their work area as they go. They’ll even move your furniture back into place afterward.

Painting interiors can be a big task requiring more than just painting the wall. It’s a skilled profession that considers how lighting affects color and how to prepare surfaces for painting and wallpapering properly. In addition, a professional knows how to choose quality colors that will add value to your home and can provide advice on color schemes that will complement the existing furniture in each room.

When choosing an interior painter, you want to make sure that they have a good reputation and are insured. Ask for references and visit their past work to see the finished product. Choosing an experienced and professional painter will save you time and money.

Professional painters have an intimate knowledge of the process and know how to quickly and effectively complete jobs. They also understand how to set up strategic timelines for completing different parts of the job so that it can be completed efficiently. Unlike the average homeowner, painters are standing on ladders all day and they know how to measure their own levels of fatigue so that they can safely continue working.

Aside from being able to complete the work at an efficient pace, a professional will also have all of the necessary tools and supplies. They will bring their own ladders, buckets, brushes, drop sheets, protective tape and other equipment, so you don’t have to worry about renting or purchasing these items yourself. In addition, they will have access to a range of high-quality products that can be used for both interior and exterior projects.

A full-service painter will often take care of removing or moving furniture, carpets and wall hangings before they start painting. This can be a huge help, especially if you are not able to move everything yourself. Then, they will take care of cleaning up once the job is done and leave you with a fresh new paint job that looks great! This is a service that should be included in your painting quote. If it is not, you may want to look for a different company.

Wallpapering

If you’re looking to add some drama or a touch of whimsy to your home, consider adding wallpaper. The process is similar to painting, but the results are more intricate.

First, clean the walls with a mild detergent to remove any dirt or grease. Then sand the surfaces to prepare them for wallpapering, and apply a primer to seal and smooth them. If you choose to use a latex-based primer, it will likely last two times longer than an oil-based version.

Once the primer dries, you can start hanging the paper. Begin with a strip that is at least 4-6 inches longer than the height of the wall. This will give you a little leeway for matching patterns. If the paper is prepasted, apply it following the manufacturer’s instructions. Otherwise, you’ll need a bucket of water for soaking the paper and a sponge brush or roller. A utility knife with plenty of extra blades will also be necessary if your wallpaper is unpasted.

Next, cut the strip to match the length of the wall. Then position it on the wall and mark where you want the edge to land with a pencil. Trim the paper to that width, using a level to draw a straight plumb line where needed.

You may have to overlap seams on curved walls, or when you’re doing an accent wall. However, if you plan ahead and use a wide enough strip, the seams will be less visible. To make sure your walls are plumb, check them regularly with a level.

Before applying the paper, trim the baseboards, chair rail and other molding to make them even with the ceiling. Also, paint any woodwork that will be exposed after you’re finished. This can save you the expense of replastering or repainting them later.

When you’re ready to hire a house painter, check out the pros on the Handy platform. Read customer ratings and reviews, then look at photos of past projects to get a sense of their skills. Then contact a few to discuss your project, set up a consultation and receive a quote.

Textured Finishes

Painting your walls with textured paint can add depth to an otherwise flat surface, conceal flaws, and give the appearance of different styles. It can be difficult to apply and requires more research than other types of paint but it offers the benefit of being long-lasting.

Textured wall paint can include additives such as sand particles to create a variety of different textures or it may simply refer to the technique used. For example, a painter can use a trowel to achieve different patterns or they could spray the wall with a specific texture. Choosing the right paint and additives can make a big difference in how your textured finish turns out so be sure to read the instructions carefully.

Some textured paints come with the additive already mixed in, which makes the process much easier. Others require that you mix the additives with the paint before applying to your walls. If you’re a do-it-yourselfer, be sure to prepare the surface of your walls before starting by using a power sander or other tool to smooth any rough patches of your drywall. Afterward, vacuum the walls to remove any dust and then prime the surface for better paint adherence.

When you’re ready to begin your textured painting project, be sure to choose a roller cover with a thick nap so that the paint can effectively reach all the nooks and crannies of your textured surface. Also, choose a paint that is labeled for textured surfaces so that you can be confident it’ll work well with your specific type of texture.

When you’re finished painting your textured surface, be sure to touch up any areas that may need it with a quality brush or a paint roller with a soft, stippled pattern. You can also add a layer of glaze or wax for added protection to your textured surface. If you prefer a more natural look, try using a lime wash or other specialty wall paints such as tadelakt, Roman clay or microcement for your textured finish. These products will add character to your home and are a great alternative to traditional wallpaper.

Accents

Accent colors are used to highlight specific areas of the room and can be an effective way to bring a sense of character and style to a space. This can be as simple as painting skirting boards, dado rails and picture rails in a striking hue to create a feature wall or as detailed as using stencils and free painting on an existing piece of furniture. The options are endless!

It’s important to keep in mind that the rule of proportions is the key with accents – you want around 60% of the space to be painted in a dominant color, 30% in a secondary shade and 10% left for an accent color. Whether this is in contrast or compliment to the main shade, it should be used sparingly and with great thought to ensure that the room doesn’t feel overdone. Accent pieces can also include a rug, wallpaper or even a piece of art.

Tips For Successful Interior Painting

Interior Painting

Interior Painting is a DIY-friendly project that can save homeowners significant money. However, it requires careful planning and execution. Start by clearing the room of large obstructions, and cover anything you cannot move with a drop cloth to protect it from accidental paint splatter.

Prepare the walls by washing them thoroughly and caulking and patching holes. Then apply a primer to ensure that the top coat will adhere. The ceiling is the most noticeable feature of a room, so it’s crucial to choose a color that works. It can be tempting to paint the ceiling the same color as the walls, but choosing a lighter shade can make the room feel larger and more open. The right paint color can also add depth and help visually raise the ceiling. If you’re unsure which option to choose, ask a full-service Interior Painters Perth at your local home improvement store for advice.

A house painter can recommend the perfect shade for your ceiling based on the size and shape of your space. Once you’ve selected a color, the next step is to start painting. Before you start, however, you should prepare the area and protect your floors and furniture. First, you’ll need to cover your floor with drop cloths or newspaper. Next, put on your safety goggles and a hat. You should also put on a mask if you’re sensitive to fumes. Finally, make sure you’re on the proper ladder for your ceiling height and use a extension pole to reach to all corners of the room.

To get the best results, you should work in sections of about 5 square feet. This will allow you to keep track of what you’ve already painted and avoid lap marks. You should also work quickly when you’re working on the ceiling. The paint will dry fast, so you need to work efficiently.

If you’re painting the ceiling the same color as the walls, you should consider tinting the wall paint to lighten it up. This will prevent the ceiling from becoming too dark and will ensure that the resulting swatch of color on the wall will match well with the ceiling.

Alternatively, you can use a white that’s a little bit lighter than the wall color you’re using. This will create a subtle contrast and will look more natural than an exact match. Either way, it’s important to test your paint colors in the room’s lighting at different times of day. This will give you a better idea of how the colors look and how they’ll change throughout the course of a day.

Paint the Walls

The walls are the most visible part of a room, and one of the quickest ways to transform the look of a space. Painting the walls can make a space feel bigger or cozier and can drastically change the overall feel of a room. Luckily, painting the walls is a DIY-friendly project that most homeowners can complete. It’s important to know a few tips to ensure a professional finish, though.

Choose the right paint color. The tiny swatches at the store are likely to look very different when painted on a wall, so it’s always best to test a few samples of your chosen colors on a wall before committing. Also, remember that darker colors can appear much darker when applied to the whole wall, while lighter colors may look washed out in a dark space.

Taping the trim is usually not necessary, but if it is, mask off the baseboards, window and door frames, crown moldings, etc. with blue painter’s tape and then carefully apply a 2-inch wide swath of paint alongside the trim using a trim brush to hide the tape and create a smooth, clean line. For large areas, use a roller instead of a brush. Start in a corner and roll on the paint in a “W” pattern, working in small 3- to 4-foot sections.

After rolling on the paint, let it dry completely before moving furniture back into the room or hanging artwork. Then, if needed, apply a second coat of paint.

When it comes to interior paint, there are many benefits to choosing a low- or no-VOC formula. These paints typically require less ventilation, are safer for indoor air quality and can help to minimize odors.

If you are replacing oil-based paint with latex or are changing the color of your walls to something darker than your current shade, a primer is often required. However, if you’re just updating a room or adding a pop of color with an accent wall, a primer is usually unnecessary.

Paint the Trim

A fresh coat of paint on the trim can give your entire house a facelift, making it look newer and more updated. It also makes it easier to match furniture, artwork and other decorations to your newly painted walls. Plus, it can make your home more appealing to potential buyers if you plan to sell in the future.

While painting your trim is not as difficult as painting the walls, it still requires careful preparation to achieve an even result. Using the right tools, supplies and techniques will help you get a beautiful finish that lasts a long time. Here are a few interior painting tips from professionals:

Start by taping the edges of the trim with masking tape to avoid getting paint on the wall or baseboards. Then use a brush and a small amount of paint to begin the process. Use a few short strokes and then longer ones to cover the surface. Continue this process until you’ve painted the entire piece of trim. Once the trim is dry, you can remove the tape.

When it comes to choosing an interior paint for trim, most professional painters recommend an oil-based paint with a high gloss level. This is because it provides a better, more durable finish than latex paint and will be easier to work with. However, since modern acrylic latex paints have made such great strides in recent years, many painters now use them on trim as well.

After you’ve finished painting the trim, it’s time to move on to painting the walls. Before you do, though, remove all the doors and hardware from their hinges. Place them in Ziploc bags to keep track of where they go when you’re done painting. This will save you a lot of time trying to figure out which screw goes where when you’re reattaching them later.

Once the trim is painted and has dried, you can replace the door hardware and hang your curtains or other furnishings. Before you do this, you should check your paint job for any flaws. If you see any spots where the paint has peeled or chipped, sand it smooth and repaint.

Paint the Floors

The floors in a room can have as big of an impact on the overall design as any wall. Painting them can add an unexpected pop of color or a bold pattern to a space. However, this is one area where it’s crucial to consider your lifestyle and how you use the room before choosing a color. Floors get dirtier and more beat up than walls, so you need to choose a color that stands up well to daily wear and tear.

First, sweep and vacuum the floor thoroughly to remove dust and dirt that can cause your paint job to chip or peel. Then, mop the floors with an anti-degreasing agent. For concrete floors, you can also add an epoxy coating to boost durability and enhance the look.

Before you start your painting, use a 2 1/2-inch angle brush to establish the edges of the room and apply Fresh Start(r) All-Purpose Primer to the entire floor area. Make sure to mask off baseboards, banisters and any other areas that you don’t want painted. You’ll need to allow the primer to dry completely before you can begin painting.

If your floors are in good condition, you may not need to prime them before applying a coat of finish. But always check the label or Technical Data Sheet for recoat times to be safe.

When it comes to choosing a finishing coat, satin or semi-gloss paint is the best choice. These finishes offer a happy medium between coverage and durability. Flat and eggshell paints have a low sheen and are more susceptible to moisture damage, so they are best used in low-traffic areas like bedrooms.

If you are going with a modern or minimalist style, light colors like white floors are in vogue and make a room feel bigger and brighter. This allows your home decor to really stand out. Darker finishes work well in rooms that have a rustic or Scandinavian style, but they can be harder to maintain because they show dirt and scuff marks more easily. Either way, painting your floors is a great way to make an inexpensive and lasting impact on a space.